I’m fortunate to have a rather large studio space for my journaling habit. When I first began journal-making, I set up my space at one end of it, using a large dining table as my main space. The printer, sewing machine, and file cabinets were close by, and a tall bookshelf held pretty photo boxes filled with all the goodies I used in my journals.
When the pandemic hit I began to work virtually from home and I had more opportunities to craft here and there because of the time saved driving and such. Because of the stay-at-home recommendation, I started Journal Breeze to gather with other journaling women virtually and to teach workshops. The best Wi-Fi was at the other end of the room, and so I began making a new space there. Never mind it was 1/6th of the size, I had to make it work, or Journal Breeze couldn’t go virtual successfully.
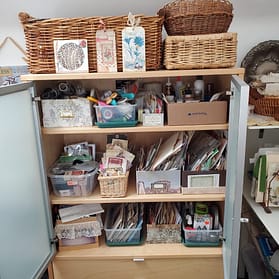
I’ve been crafting in this space now for ten months, and it was time to reassess; clear out what wasn’t working, reorganize, and set it up to make the best of the space for my needs. I was able to buy a shelf and drawer unit from my neighbor’s moving sale. It provides great storage and hides everything when I’m done. I keep my favorite printed digitals handy and store journals I’m selling or gifting for safekeeping in the drawers.
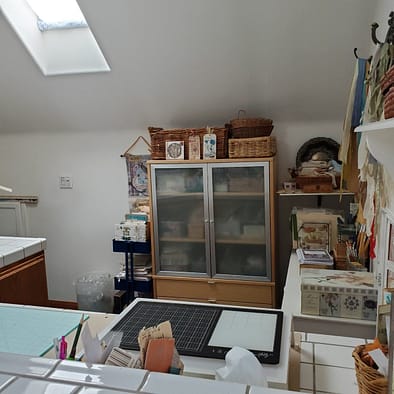
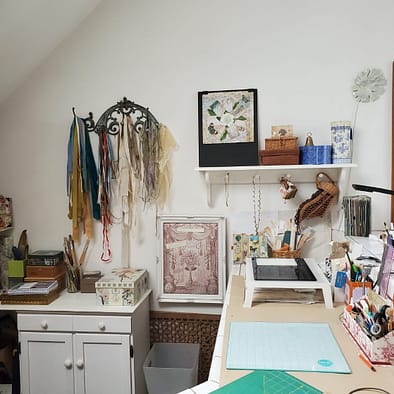
I added a long board to serve as a side table, on the right in this picture. I painted it white, laid one end over the top of a short cabinet, and attached two legs at the other end by the wall.
I made a short shelf to go above it to hold a basket of laces and trims. I placed an antique Victorian metal tray that I love behind it for beauty, but it will come in handy as I sift through the trim basket when I’m using it.
Here, I’ll share my process for reorganizing supplies that works for me. It may seem obvious to some of you, and it may help others. I had to change my thinking to get here.
- I had to put function and purpose over pretty and fun. This meant pulling items together from everywhere I could find them to begin.
- Once gathered, the item’s formed large categories (book pages, labels, colored pencils), rather than being divided into subtypes as I had done before, by maker or color, or size.
- Next, I prioritized the categories by how often I would use the items, so I knew where to place them in my space.
- The last step was determining how much space was needed to store a category and finding something that would fit in that space.
1. The biggest and most important of all the changes I made was to put all of one category of materials and supplies together in one space. I was keeping things separated into smaller containers that distinguished between them, but now similar items are placed together in a larger container, drawer, or file. This refreshes my memory of all that I have to choose from, and it keeps me from buying similar stuff.
2. I put the supplies I use most often together with those I want to use more often, in plain sight. For example, I moved a three-tier cart from one part of the studio nearer to my workplace and filled it with what I want handy. I put all my loose book pages, antique and vintage, on one shelf. On the top shelf, I put all my ephemera holders, postage stamps, and other smaller papers, so I can access them easily.

3. I hung ribbons and ties on an antique metal piece, and this gives me a beautiful visual and easy access to those ribbons and ties. To the right of the antique metal piece, I replaced a mirror on the wall with a shelf that has pegs underneath, so I can place visually inspiring things I’ve made on it, as well as containers filled with miscellaneous things. I’ll change items on this shelf often, I think.


4. Wanting to put a project’s inspiration visuals in view temporarily, I made a pinboard by covering a foam core board with batting and fabric and then placing it in a frame I had repainted white with a dabbing method to give it a more vintage look.

I hope you enjoyed seeing behind the scenes into my teaching and crafting space and take away an idea or two for your space. Let me know in the comments below.